Visit HelenAnneDesign's Craftsy Pattern Store »

Friday 24 April 2015

Combination knitting experiement

It's been 3 solid weeks of rain which can be pretty frustrating when you have outdoor chores to be done.

On this occasion though I picked up my needles looking for a distraction and come up with a new idea for me at least.

Being someone who always hates doing the second sock this new idea is a god send for me.  Using combination and double knitting I am practicing a way on how to knit two socks at the same time one inside the other, much to my delight its working out well on my son's socks.

The outside sock is knitted with my right hand and the inside sock is knitted with my left hand.

All going well I see a tutorial in the future.


Monday 20 April 2015

Creating a never ending journey

Even after 38 years of creating I'm still learning more I don't think I will  ever run out of new things to learn.

So many new techniques.
  • I finally found out what the fuss was about double knitting, I used to think it was just knitting with double knitting (8ply) wool lol.   Now I know why friends in Europe looked at me strangely and shook their heads.  I understand why all those patterns in double knitting never made sense. 
  • I also have improved my crocheting.  From being an occasional granny square maker I have progressed to a hand bag and a stand for my toilet rolls 
  • I'm about to start working on my fair isle techniques soon.  While I've always known how to do fair isle my work was always tight.  Now through the magic of you tube I'm going to be following the advice of other knitters on loosing up those stitches. 
I guess what I am trying to say here is no matter how much you learn you can if you look hard enough find something exciting and new.

Find the the joy in your day.

Helen

Crochet Chevron Purse tutorial DIY handbag Learn crochet Pattern here


Wishing well by Baerbel Born on Ravelry 

 Pattern here

Sunday 21 December 2014

Christmas present for my teen

My son turns 16 soon and every year it becomes harder and harder to find presents that don't involve me spending a fortune on technology.   Imagine my delight as a knitter when he brought me a design which he wanted me to heavily modify for his Christmas present. 

It’s knitted in separate pieces then sewn together with emphasis on the seems which I son informs me makes it cool.

I’m so pleased with the outcome I think I’ll be designing something similar in the near future.

Here are some details about my project:
 
Yarn Wendy Supreme Luxury 5 x Colbalt, x 4 Grape, and 3 x Platinum
Size: 40 inch chest 
Style Funky Casual 
Needles 5.5 mm round  


Saturday 18 October 2014

How much yarn is enough?

Do you ever find it frustrating when you find that perfect wool but you've yet to find the pattern that makes for a perfect marriage between yarn and design?

Check out this Knitting Calculator it gives you a guide of how much yarn you'll need for a scarf?  a hat?  or a sweater, add 15 - 30 % to be sure because remember cables and ribs take up more yarn than flat knitting.


Knitting Calculator at Jimmy Beans Wool  


Tuesday 7 January 2014

Making a crochet chain...

Making a crochet chain can be quite simple.  I love using them when I want a simple cord and don't want to knit one.  They are also great when you want to use a provisional cast on.


Tie a slipknot at the beginning of the yarn strand.

Place the loop onto the crochet hook.  Insert the hook through the loop and under the longer yarn. 


Wrap the yarn once over the hook and in front of the loop.  Also known as the "thread over".

Pull the new loop through first loop on the hook.  This makes one chain (ch). 


Repeat until the chain becomes the desired length.  You are creating chain stitches, abbreviated as 'ch sts'.  One loop should always remain on the crochet hook.  Continue until desired length is achieved one loop should always remain on the crochet hook.   Always keep your thumb and forefinger near the stitch on which your working, to ensure steadiness and good control as per photo. 


Cut yarn and pull through the loop to fasten off.


Adapted from, How to crochet a chain from http://www.wikihow.com/Crochet-a-Chain

How to Make a Tassel - easy to follow instructions with pictures.

Making tassels can be fun and they are so useful for knitting projects or adding to a bookmark or card.  To make your own tassel for the instructions below, you'll be surprised at how easy it is. 

Things you'll need:
  • String, cord or yarn in a color of your choice. The string used here is crochet cotton, available in most craft stores and in many different colors.  
  • Scissors  
  • Stiff Card or ruler 
  • Tapestry needle or large sewing needle.
 Steps 
Cut stiff card to the size you want (I used 3" for adult) or use ruler as per your preference.  If in doubt start with a card that is a little bit wider than the size you want as you can always trim the ends shorter later. 


    Wrap the string, cord, or yarn around the ruler or card several times (I wrapped 22 times for 8ply yarn, but use personal preference).  The number of loops, along with the thickness of the string, determines the thickness of the tassel, so wrap until it looks like the size thickness of tassel your wanting to make.  Remember there is two sides here to consider. 
    Cut the end of the string off the loops and cut a second piece of a generous length, perhaps a yard (90cm) or more.  Fold this second piece in half. 


    Thread the folded end of the second string under the loops and twist.  There should be no need to use a needle.  You should have a short loop on one side and two long tails on the other side.


    Pull the two long tails through the short loop. 


    Tighten this knot snugly by pulling on the two long ends.  Then slide the tassel off the ruler or card.  

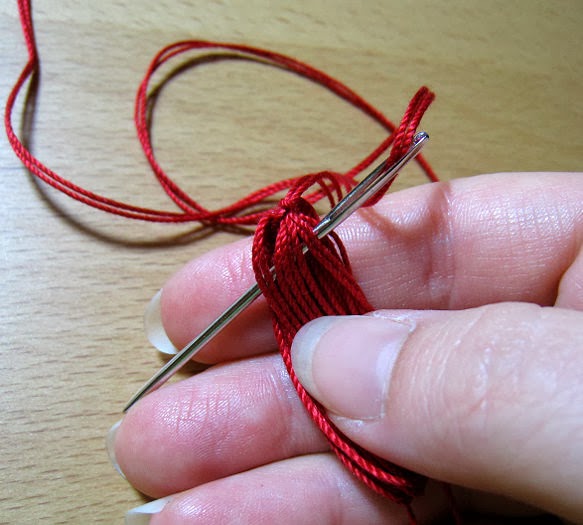
    Thread both loose ends through a large needle 


    Double the two loose ends, leaving about a 4 inch (10 cm) loop.


    Push the needle through the top of the tassel and out the side.


    Wrap free ends several times around the tassel, a little ways down from the first knot.   Wrap tightly, and aim for even loops, forming a small, round ball.
    Push the needle down through the center of these loops from top to bottom. 


     Pull the two long tails all the way through and tighten the knot firmly.


    Cut open the bottoms of the loops. 

     Trims the ends to an even length.
    Adapted from tassel instructions found at http://www.wikihow.com/Make-a-Bookmark-Tassel 

    Monday 7 October 2013

    Llama play

    Recently I was offered 4 fleeces in return for preparing the fleece and making something for the owners of the fleece show their kids what the finished product looks like.

    Watch this space for a new design coming your way... I have something special in mind for this family of Llama lovers :)